


Builder Gel 101: Application Techniques for Beginners – Your Complete Step-by-Step Guide
If your nails bend, peel, or never seem to grow past a certain point, builder gel might be the solution you've been looking for. Builder gel — often known by its popular nickname BIAB (Builder in a Bottle) — is a thicker, more flexible type of gel that you apply to the natural nail and cure under an LED lamp to build a strong, protective overlay. Unlike regular gel polish, which is thin and mainly adds color, builder gel has structure. It reinforces weak nails, smooths out ridges, and can even add a hint of length.
Builder gel has become a firm favourite among clients looking to strengthen and subtly lengthen their natural nails, and is increasingly seen as a professional alternative to acrylic extensions. The good news? Applying builder gel at home is beginner-friendly once you know the rhythm — and this guide will walk you through every step.
In this comprehensive beginner's tutorial, we'll cover: what builder gel is and how it differs from other products, the essential tools you need, proper nail prep (the most important step), a step-by-step application guide, how to build the perfect apex, common mistakes to avoid, and troubleshooting tips. By the end, you'll know exactly how to apply builder gel like a pro.
What Is Builder Gel?
Builder gel is a thick, self-leveling gel used to create nail extensions, overlays, or strengthen natural nails. It sits between a base coat and top coat in terms of viscosity but is much thicker than regular gel polish.
Key characteristics of builder gel:
-
Creates structure and apex on the nail
-
Cures under UV or LED lamp (typically 30–60 seconds)
-
Available in soak-off and hard gel versions
-
Comes in clear, pink, nude, and many colors
-
Provides durability, strength, and a professional finish
Builder gel vs. regular gel polish: The prep work for builder gel is much the same as it would be for other nail enhancements, however the application is very different. The thickness of builder gel means it can't be applied the same way as regular gel, as any inconsistencies on the nail are more obvious. With regular gel polish you don't build any type of structure, but with builder gel you need to make sure the correct structure is there to support the natural nail.
Builder gel vs. hard gel: Builder gel is slightly softer and more flexible than hard gel, making it ideal for overlays and short extensions. It offers a more natural feel and easier soak-off removal. Hard gel, on the other hand, is designed for nail enhancements like correcting the arch, extending the free edge, and building longer nails.
A well-applied builder gel overlay can last four to six weeks with minimal chipping or lifting, far outperforming a standard gel polish application on clients with active lifestyles.
Who Is Builder Gel Suitable For?
Builder gel works best on healthy natural nails that need extra support to grow. It's particularly beneficial for:
-
People with weak, bendy, or peeling nails
-
Those who have damaged nails from previous treatments
-
Long-term nail-biters who struggle to grow their nails out
-
Anyone with soft nail beds prone to breakage
-
Clients who want to grow their nails without resorting to acrylics
Builder gel comes in lots of gorgeous nude tones — there is one to suit every skin tone — and it makes the perfect base for a French manicure.

Essential Tools & Products You'll Need
Before starting, gather everything. Skipping tools often leads to lifting.
Your beginner builder gel kit checklist:
-
Nail file (180/240 grit)
-
Buffer block
-
Cuticle pusher
-
Nail dehydrator
-
Primer (acid-free recommended)
-
Base coat (if required by your builder gel brand)
-
Builder gel — the star of the show!
-
Builder gel brush (if not built into the bottle)
-
UV/LED lamp — builder gel only cures under light
-
Lint-free wipes
-
Isopropyl alcohol (91% or higher)
-
Top coat
-
Cuticle oil for aftercare
💡 Lamp note: Builder gel under-curing is the second most common cause of early lifting, behind poor prep. A lamp that appears to work normally may be delivering reduced UV output if the bulbs are over 12 months old. Replace bulbs annually for consistent results.
Step 1: Proper Nail Prep — The Most Important Step
Most builder gel lifting issues happen because of poor prep. The natural nail plate carries oils, moisture and debris that prevent gel from bonding properly. If any of these remain when product is applied, the gel will eventually separate from the nail.
Here's how to prep correctly:
-
Remove old polish completely — any residue will compromise adhesion
-
Push back cuticles gently — use a cuticle pusher; do not cut unless trained
-
Remove cuticle growth from the nail plate — this is essential for proper bonding
-
Lightly buff the entire nail surface with a buffer block — this removes the natural shine and creates micro-texture that gel bonds to. A shiny nail surface gives gel almost nothing to grip
-
Shape the free edge — file nails to the desired shape before any product goes on
-
Clean with alcohol — wipe the entire nail plate with isopropyl alcohol on a lint-free wipe
-
Apply dehydrator — wait until fully dry
-
Apply primer — thin coat; let air dry
⚠️ Never skip cuticle removal. Gel touching skin = lifting.
Pro tip: For clients with naturally oily nails, repeat the alcohol wipe twice. Oil on the nail surface is the invisible enemy of gel adhesion.
Step 2: Apply a Thin Base Layer (Slip Layer)
Some builder gels are "self-leveling" and can act as a base. Others require a separate base coat. Check your product instructions.
A slip layer is an uncured layer, which improves self-levelling and the adhesion of the subsequent gel layer, and helps to achieve smooth, bubble-free application.
How to apply the slip layer:
-
Apply a very thin layer of builder gel — this layer does not need to be cured yet if you plan to build structure immediately
-
Keep product away from cuticles
-
Cap the free edge — seal the very tip of the nail
-
This layer helps the next layer adhere properly
Pro tip: Apply a thin, even layer of builder gel to each nail, allowing it to self-level.
Step 3: Build the Apex — The Most Important Step for Strength
The apex is the highest point of the nail structure. It prevents cracking and adds strength. Without a proper apex, builder gel is just thick gel polish — not a structural nail enhancement.
Where should the apex be?
-
Short nails → Slightly above center
-
Long nails → 1/3 from cuticle area
How to build it:
-
Pick up a medium bead of builder gel — about the size of a grain of rice
-
Place the bead in the center of the nail, about 1mm away from the cuticle
-
Gently guide the product toward the sidewalls — use small, gentle movements to work the gel into the nail rather than long brush strokes
-
Avoid flooding cuticles — leave a minimal distance from the cuticles
-
Flip the hand upside down for 5–10 seconds before curing — gravity will help form the perfect apex automatically
Pro tip: Use a liner brush — it's your secret weapon for builder gel application. Use it to fill in any gaps in the overlay, perfect the structure and apex without flooding the nail, and ensure smooth, even product placement.
Why flipping the hand works: For a strong, balanced structure, have your client turn their hand upside down for a few seconds before curing. This encourages the gel to self-level into a natural apex, giving the nail the perfect shape without adding bulk.
Step 4: Cure Under UV/LED Lamp
Follow your product instructions for curing times:
-
LED: 60–90 seconds
-
UV: 2 minutes
Under-curing causes:
-
Peeling
-
Lifting
-
Soft gel center
-
Allergic reactions
Never remove your hand early. If you're unsure, it's better to cure it longer than not long enough.
💡 Heat spike warning: A heat spike is a sudden, intense warmth felt during curing. It happens because curing gel is an exothermic chemical reaction — the thicker the layer, the more heat is released at once. The fix is straightforward: apply thinner coats. Two or three thin layers will cure with minimal heat. If you do feel a spike mid-cure, briefly remove your hand from the lamp for a few seconds, then continue.
Apply builder gel in three layers: a base, slip, and bead. Work on one nail at a time and cure in between nails. This ensures flawless application and saves time — so you don't have to refine after application.
Step 5: File & Refine Shape
After curing:
-
Remove the sticky layer (if required by your product)
-
File sidewalls for a clean shape
-
Refine the overall shape
-
Smooth the surface
-
Dust off all filing debris
Focus on symmetry. If you're new to builder gel, achieving a perfectly smooth application might take time. Don't stress! If needed, refine your overlay after curing to perfect the shape. A well-structured nail ensures longevity and prevents lifting. With practice, your application will become so smooth that filing won't be necessary — but until then, refining is your best friend!
File the free edge after application for a crisp finish. Lightly filing the free edge after applying and curing builder gel removes any bumps or inconsistencies and helps prevent lifting.
Step 6: Apply Top Coat
Apply a thin, even layer of top coat:
-
Cap the free edge
-
Cure fully
-
Remove tacky layer if needed
-
Common Mistakes to Avoid
| Mistake | Result | How to Fix |
|---|---|---|
| Skipping or rushing nail prep | Lifting within first week | Complete full prep order; never skip steps |
| Applying too thick in one layer | Soft spots inside, uneven apex | Apply thin, even layers; build structure gradually |
| Not capping the free edge | Lifting starts from the tip | Cap the free edge with every layer |
| Gel touching skin or cuticle | Lifting or allergic reaction | Leave 1mm gap from cuticle; clean edges immediately |
| Brushing too fast like gel polish | Air bubbles in the gel | Use slow, deliberate brush movements with light pressure |
| Not building the apex | Weak nails, cracks at stress point | Always build the apex; flip hand upside down to form natural apex |
| Not flash curing before full cure | Gel shifts, uneven surface | Flash cure each nail briefly before full cure |
Remember: Builder gel is not gel polish. Slow down. Builder gel requires different technique.
Troubleshooting Common Problems
Lifting
Lifting is the number-one complaint with builder gel. If your builder gel lifts:
-
Day 1-3 → Prep failed
-
Day 4-7 → Cure failed
-
Day 8+ → Impact or natural regrowth
Lifting is almost always prep, placement, or cure time. Review your prep, ensure proper cuticle clearance, and check your lamp power and curing time.
Air Bubbles
Common causes: Shaking the bottle (which whips air into the product), applying gel in thick globs, and using fast or aggressive brush strokes that fold air into the layer.
To prevent bubbles:
-
Roll the bottle gently between your palms instead of shaking
-
Apply thin coats
-
Use slow, deliberate brush movements with light pressure
-
If you spot a bubble before curing, nudge it to the edge of the nail with the tip of your brush and pop it before placing your hand in the lamp
Chipping and Cracking
Chips and cracks along the free edge are usually a capping issue. Every layer of builder gel — base, build, and top coat — should seal (or "cap") the very tip of the nail.
Why Choose Hanyinails for Your Builder Gel Needs
As a professional nail products manufacturer with 12 years of OEM customization experience, Hanyinails offers builder gels engineered for:
-
HEMA/TPO-free formulations for safer, gentler application — many traditional builder gels contain HEMA and TPO, common allergens that can cause contact dermatitis over time
-
Smooth self-leveling finish that holds structure while sculpting
-
HEMA/TPO-free, available in 12 professional colors, and designed for clean, efficient application
-
30ml double size for professionals who need volume
-
Custom branding options through OEM/ODM support
With 10 production lines, 60 production machines, 8 QA/QC inspectors, and an 8,000㎡ workshop, Hanyinails delivers consistent quality at scale — whether you're a salon professional, a brand owner, or a DIY enthusiast.
Hanyinails builder gel does not flood cuticles — a rare and valuable feature for both beginners and pros.
Final Thoughts
Builder gel is one of the most forgiving nail products to learn, but it still has a specific set of rules. Break them, and you'll deal with lifting, bubbles, soft spots, or cracking within the first week. Follow them, and your sets last 3 to 6 weeks without a complaint.
The key takeaways for beginners:
-
Prep is everything — never skip a step
-
Thin layers are better than one thick layer
-
Build the apex — it's what makes builder gel structural
-
Flip the hand to let gravity do the work
-
Cap the free edge with every layer
-
Cure properly — don't rush
-
Practice makes perfect — your first set won't be your best, and that's okay
For beginners, the key is mastering the application technique through patience, precision, and understanding the properties of the gel itself. With the right tools, proper prep, and consistent practice, you'll be applying builder gel like a pro in no time.
Whether you're strengthening your natural nails, repairing damage, or building extensions, builder gel is one of the most versatile and rewarding products in the nail world. Happy building!

Velvet Chrome vs. Magnetic 3D: The Two Texture Trends Defining 2026
Baccarat Nails 2026: Where Crystal Glassware Meets Nail Art – The Complete Trend Guide

Soft Chrome vs. Mirror Chrome: Which Nail Finish Is Right for 2026? – The Complete Guide

Jelly Candy Aesthetic 2026: Pinterest‘s 100% Search Surge & the Rubberised Nail Art Trend
Polygel vs. Acrylic vs. Builder Gel: A 2026 Professional’s Comparison Guide
Beaded Nails 2026: The Sculptural Manicure Taking Over Red Carpets – Your Complete Guide
Recommended for You
Key Features:
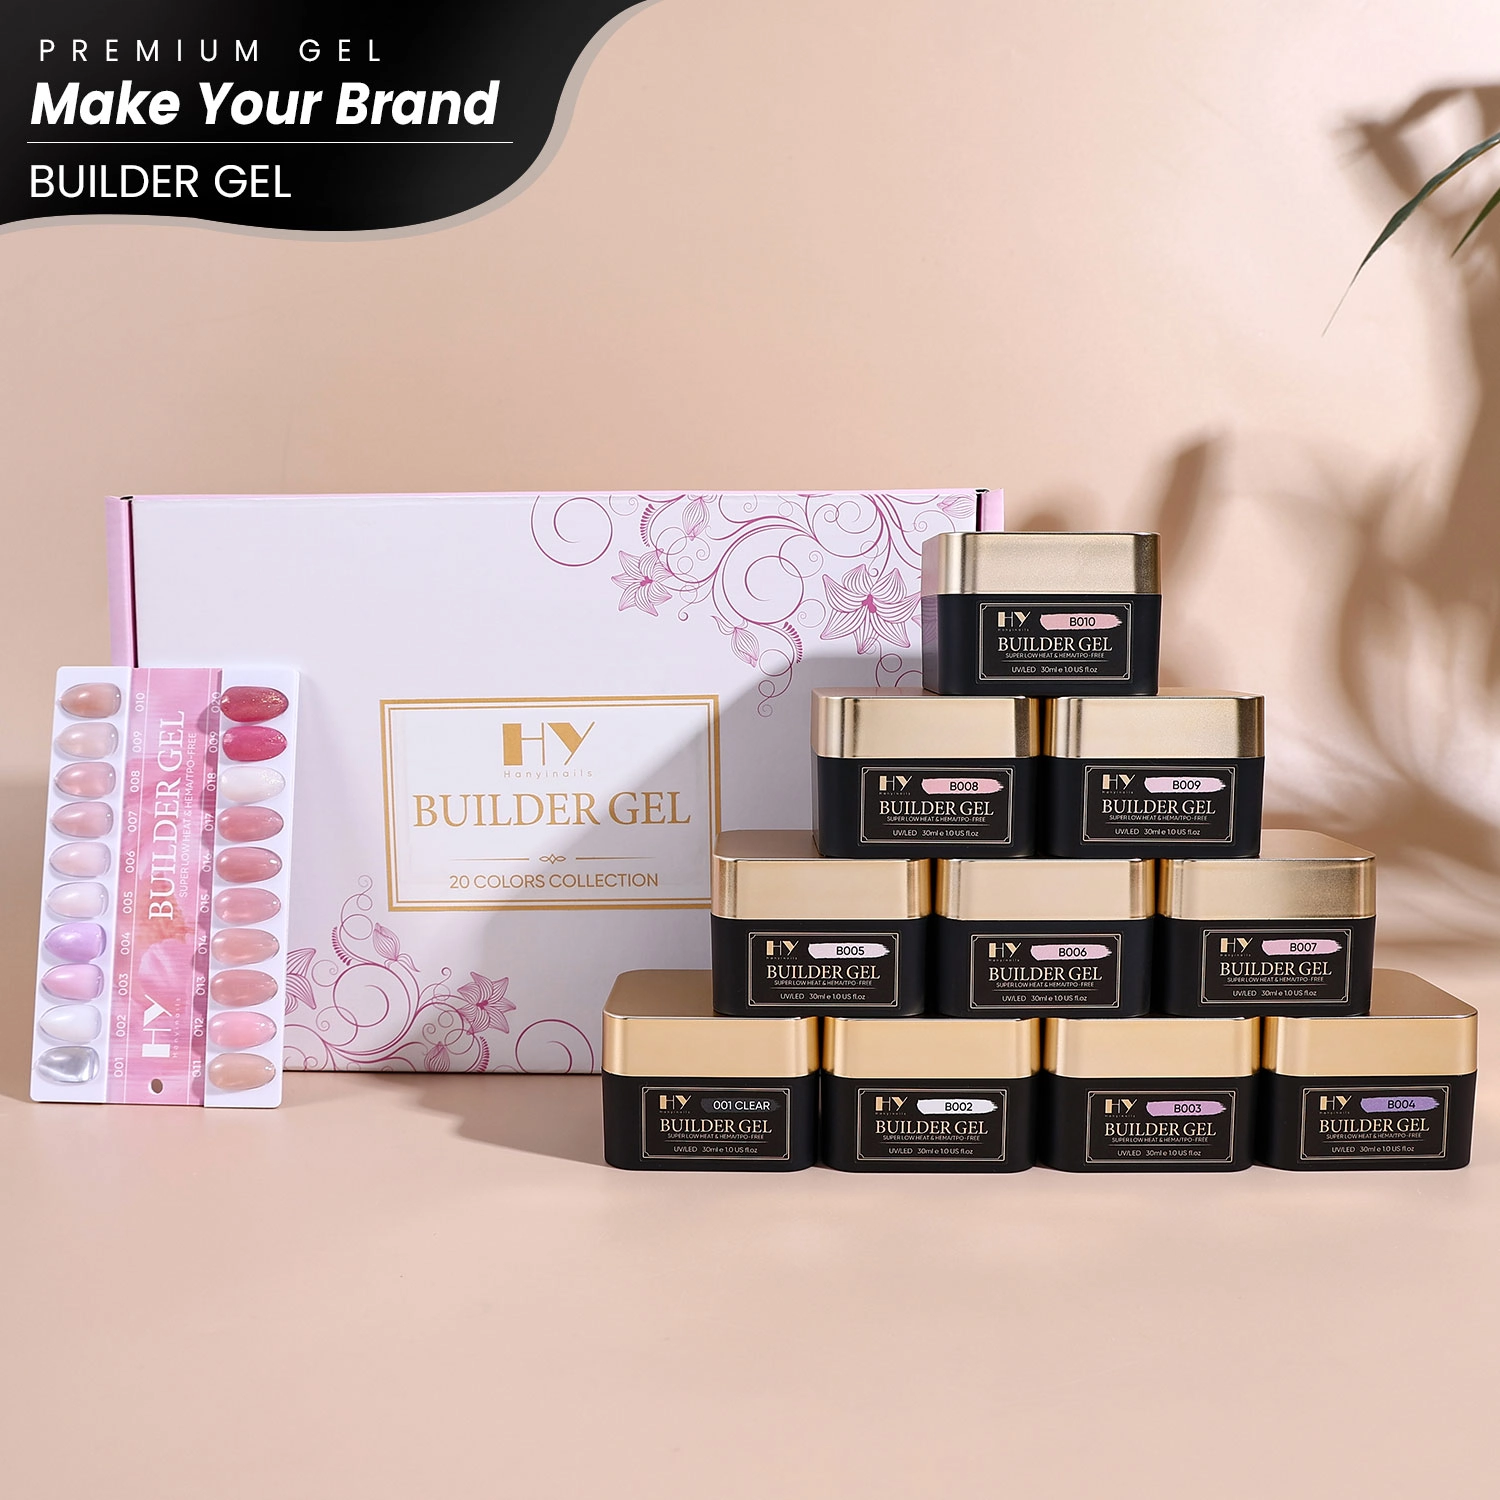
🏗️ 20 Builder Shades – Clear, pink, nude – color + structure.
🔥 Super Low Heat – Zero heat spike – no burning.
🖌️ Self-Leveling & Easy to Shape – Smooth application – perfect apex.
💪 Strong & Durable – 3-4 weeks wear – chip-resistant.
💅 HEMA & TPO Free – Safe for natural nails.
💧 Soak Off Formula – Easy removal – no damage.
⚡ UV/LED Curable – Quick cure – efficient.
🎨 30ml Professional Size – Salon & retail ready.
🛠️ OEM/ODM Support – Custom formula, packaging, branding.
Key Features:
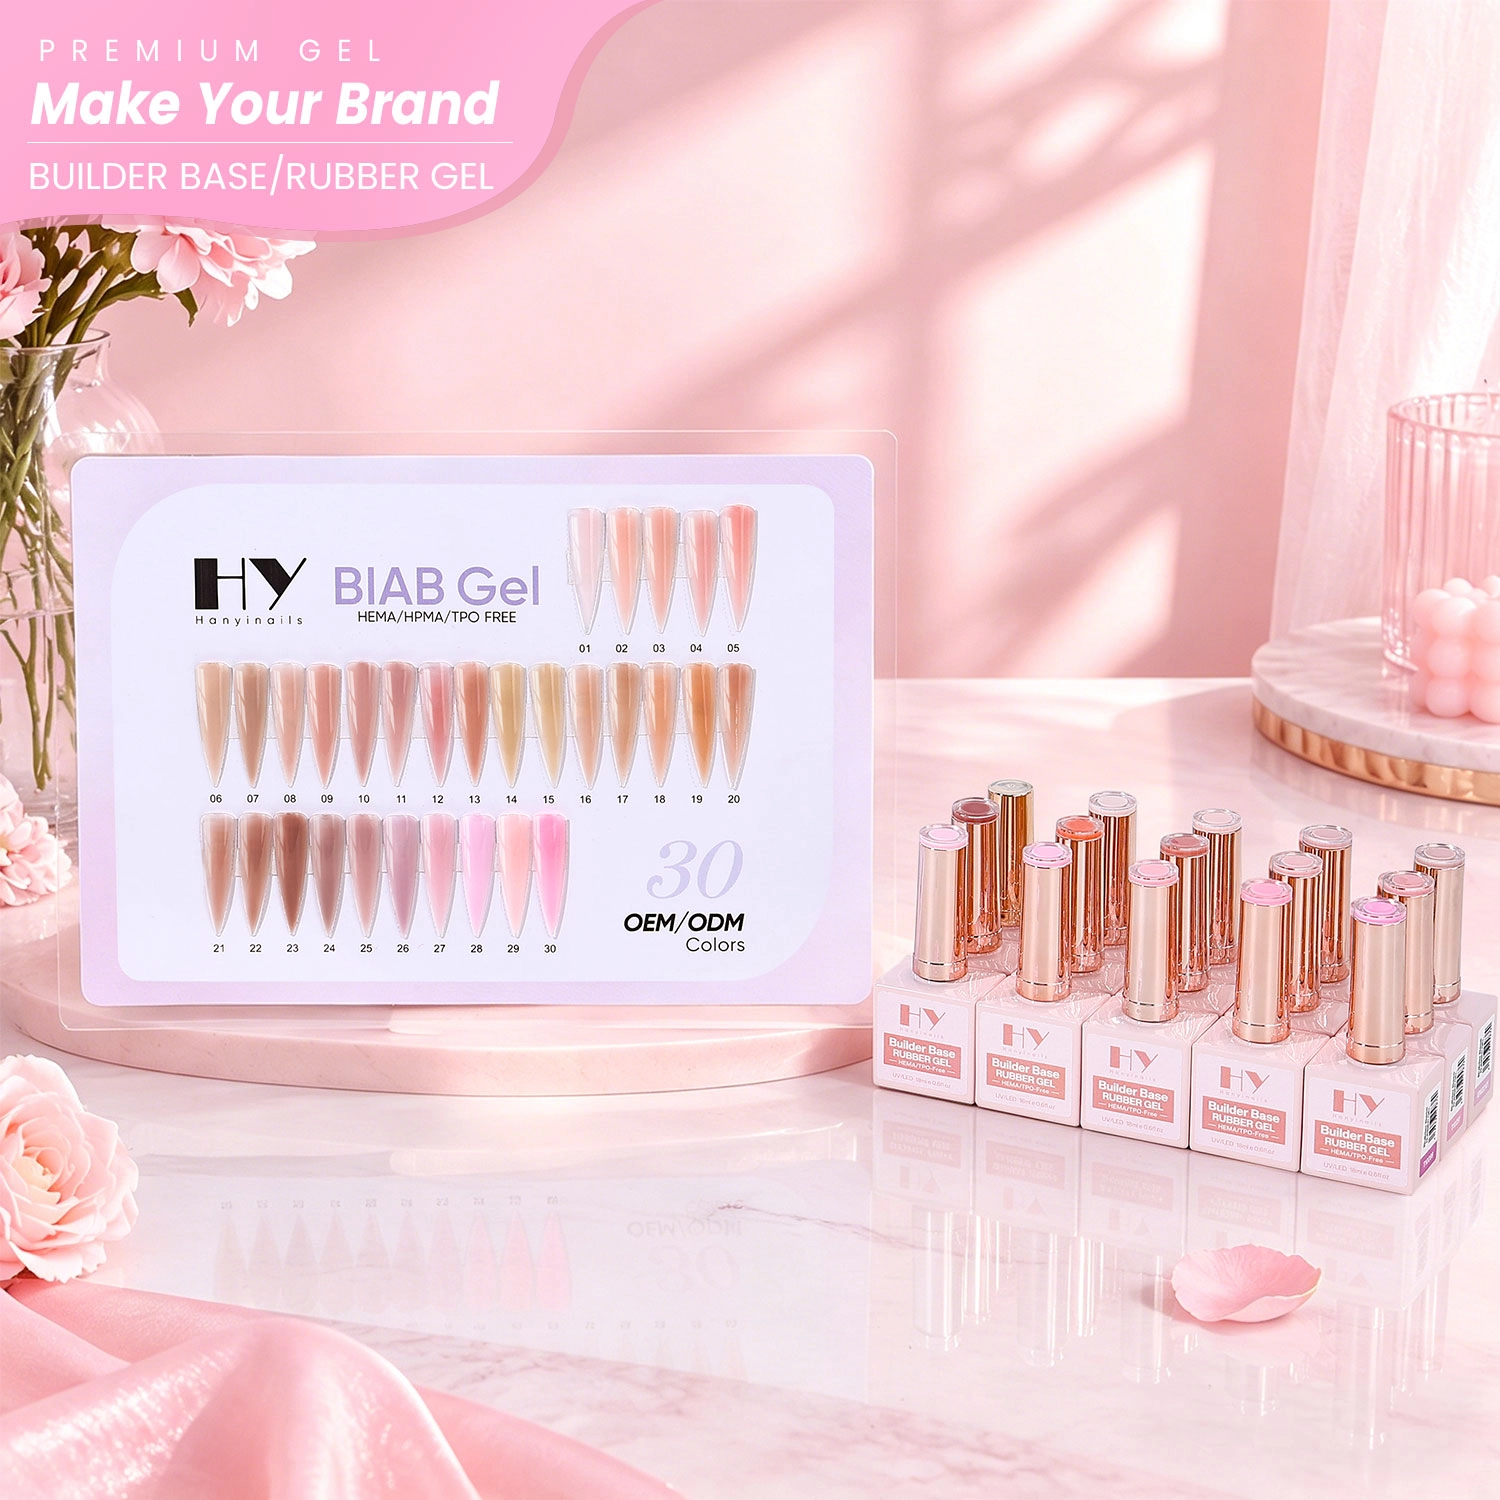
🏗️ 15 Builder Base Shades – Clear to nude – complete flexible base collection.
💪 Flexible Rubber Strength – Strong adhesion – bends with natural nails.
🖌️ Smooth Self-Leveling – No streaks, no bubbles – beginner-friendly.
🌟 Long-Lasting & Chip-Resistant – 3 weeks wear – glossy and fresh.
💡 HEMA & TPO Free – Safer for natural nails.
🌱 Vegan & Cruelty-Free – Eco-conscious – never tested on animals.
💧 Soak Off Formula – Easy removal – no damage to natural nails.
🕯️ UV/LED Curable – Quick cure – efficient for professional use.
🎨 18ml Professional Size – Salon & retail ready.
🧴 OEM/ODM Support – Custom formula, packaging, branding.
🔑Key Features:
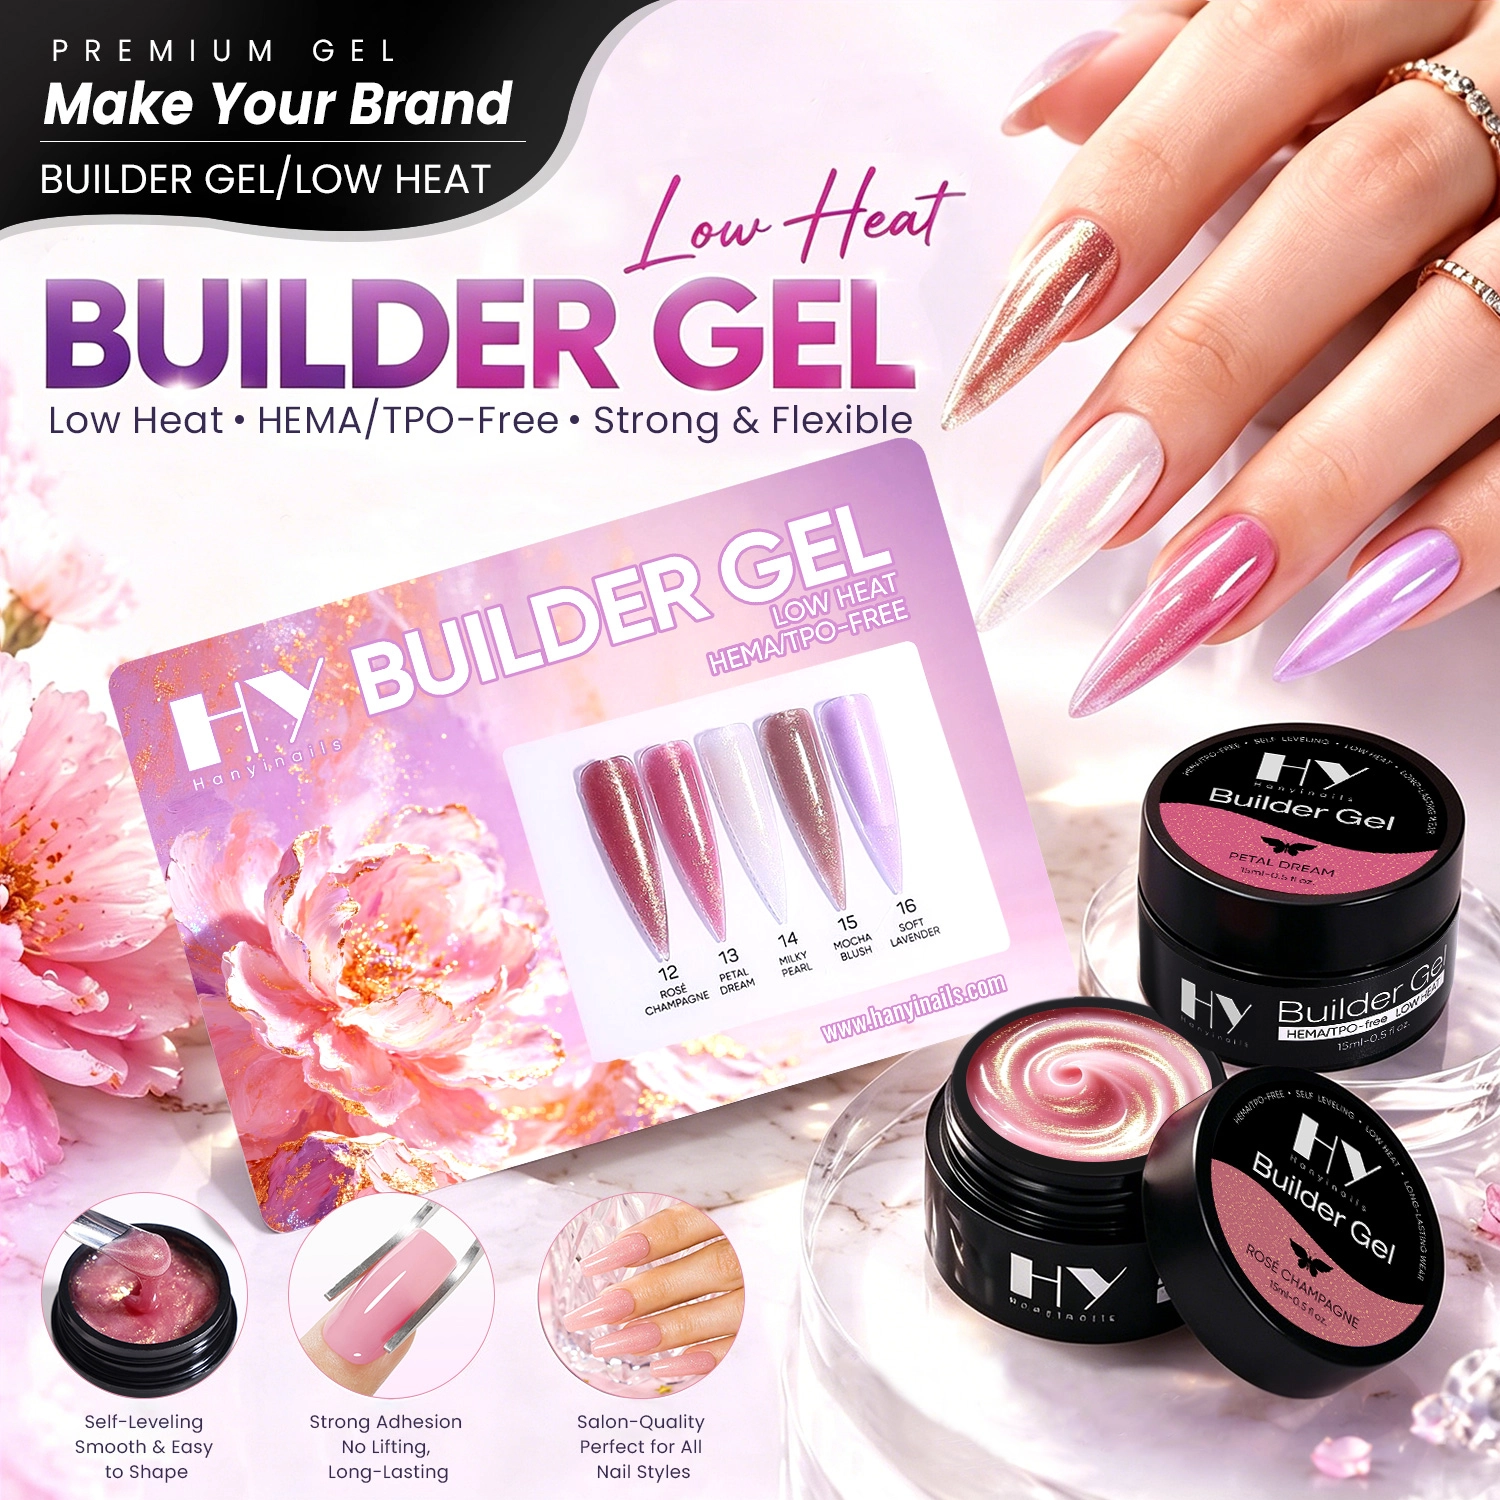
🔥 Super Low Heat Formula – Zero heat spike – no burning. Perfect for sensitive nails.
💚 HEMA & TPO Free – Non-toxic, low-odor – safe for natural nails.
🖌️ Self-Leveling & Easy to Shape – Smooth application – builds perfect apex.
💪 Strong & Durable – High-strength – 3-4 week wear.
💧 Soak-Off Removable – Easy removal – no damage to natural nails.
🎨 Multiple Shades Available – Milky, blush, rose, champagne, lavender + more.
💅 Professional & DIY Friendly – Salon-quality – beginner-friendly.
🛠️ OEM/ODM Supported – Custom colors, packaging, branding.

🔑 Key Features:
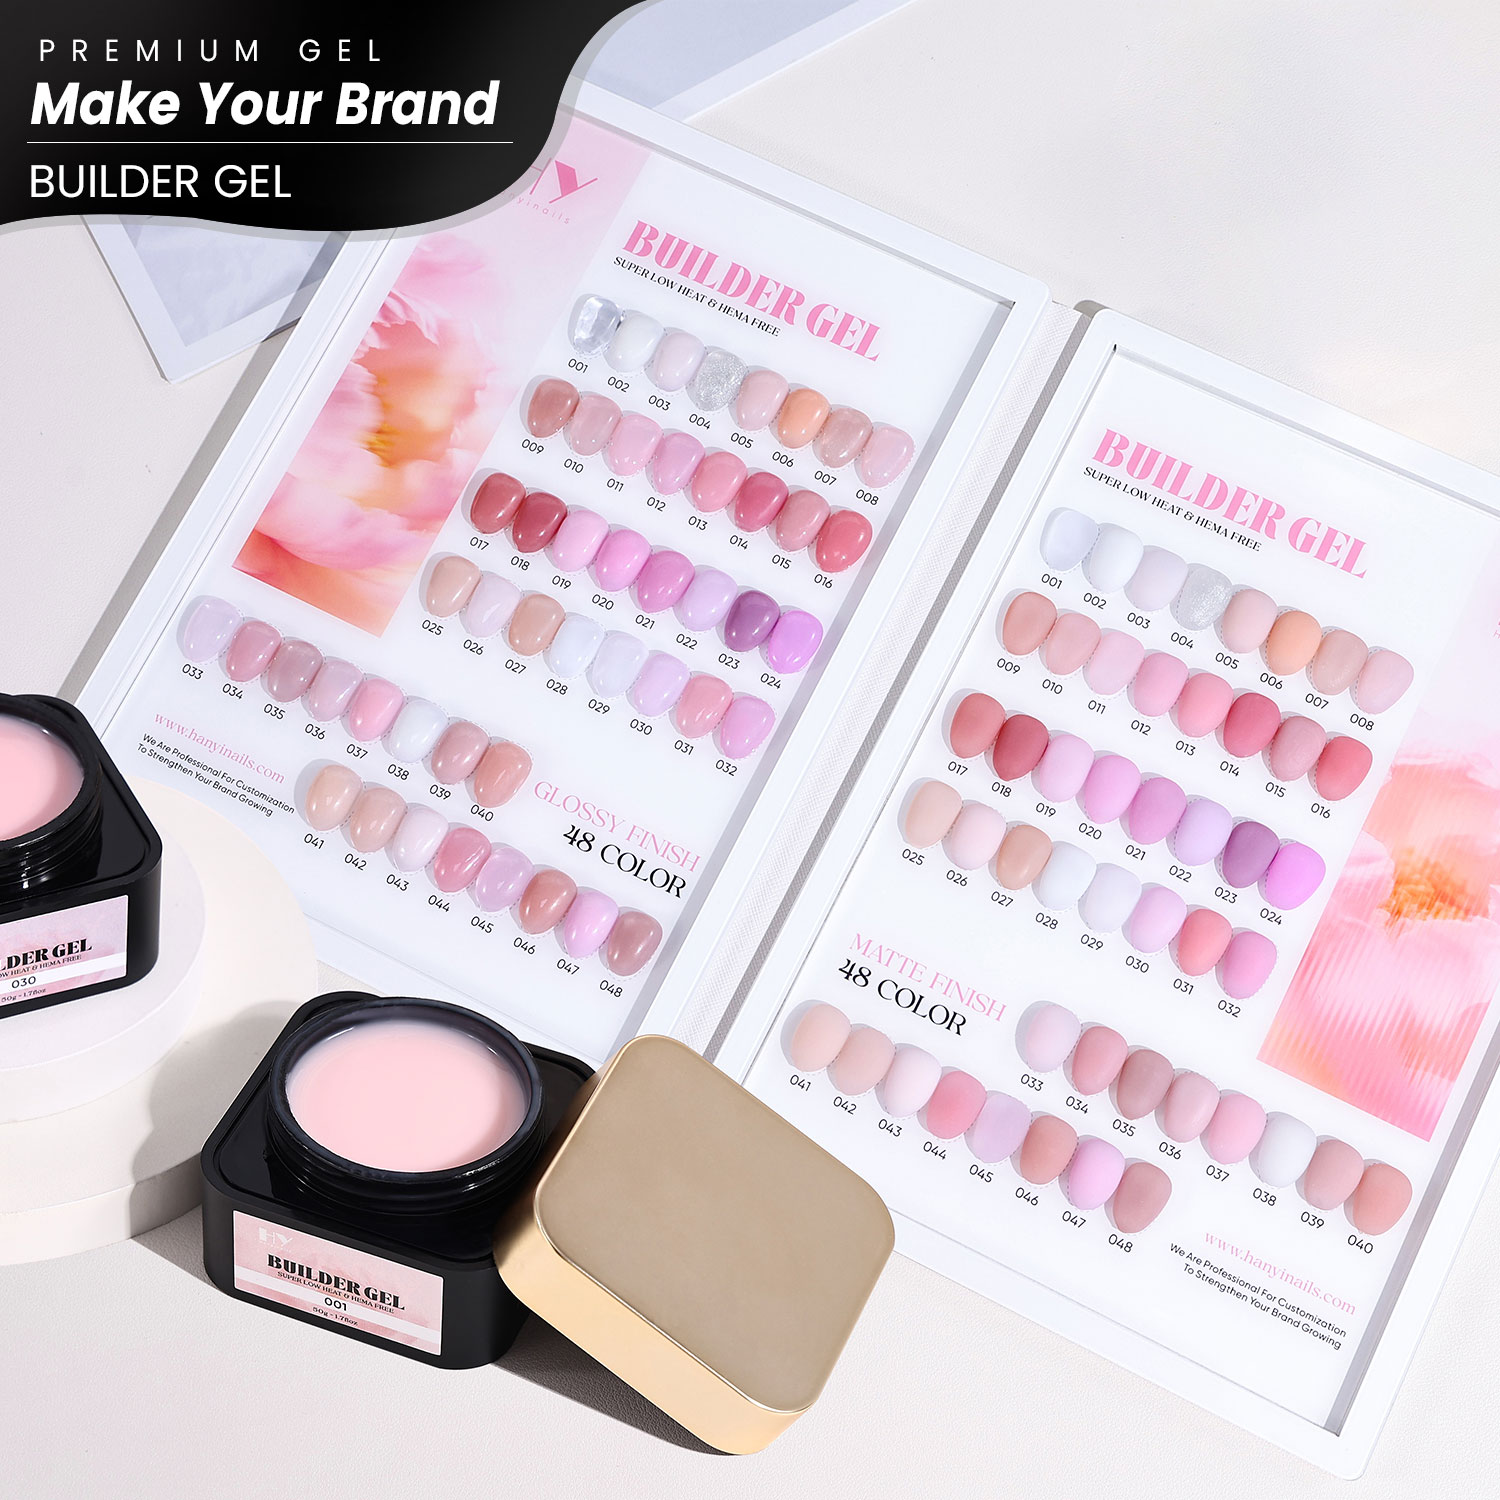
🎨 48 Colored Builder Gels – Pink, clear, nude, and more – color + structure in one.
❄️ Super Low Heat – Gentle curing, no stinging – ideal for sensitive nails.
💚 HEMA & TPO Free – Non-toxic, low odor, safe for natural nails.
⚡ UV/LED Curable – 60s LED / 90s UV – quick and efficient.
🖌️ Self-Leveling & Non-Flowing – Smooth application, no cuticle flooding, minimal filing.
🌿 Long-Lasting Wear – Chip-resistant for 3-4 weeks.
📦 50g Professional Bottles – Salon size for heavy use and professionals.
🛠️ OEM/ODM Supported – Custom colors, packaging, and branding – free design.
Looking for a creative, premium, and reliable nail product manufacturer?
Whether you're an Amazon seller, Shopify store owner, chain store buyer, brand owner, distributor, wholesaler, or nail supply retailer — Hanyinails is your trusted partner for custom and wholesale nail solutions.
Hanyinails
Hanyinails
Hanyinails
Hanyinails